


Breaking News
 "Economic Depression worse than Covid is coming" and America is not ready | Redacted News
 Is Ron Paul Still Optimistic?
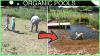 I Made a Tiny Natural Swimming Pool - Here's How
 Food Prices Are Rising… Grow These NOW
Top Tech News
 Elon and SpaceX Have Made AI Training 10 Times Faster
 Oklo COO Says Nuclear Waste Could Power America For 150 Years
 SpaceX Announces LARGEST Starship Mission Ever! They've never done this before!
 Cars Are Fast Becoming Dystopian Prison Pods...
 Our Emergency Water Plan Wasn't Good Enough - So We Built This
 Sodium Ion Batteries Can Reach 100 Gigawatt Per Hour Per Year Scale in 2027
 Juiced Bikes proves capable electric motorcycles don't have to cost a lot
 Headlight projectors turn your car into a drive-in theater
 US To Develop Small Modular Nuclear Reactors For Commercial Shipping
 New York Mandates Kill Switch and Surveillance Software in Your 3D Printer ...


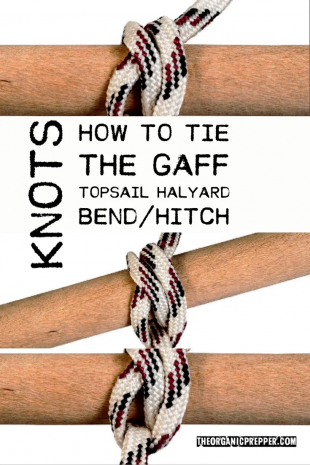
Knots: How to Tie the Gaff Topsail Halyard Bend/Hitch
By 1stMarineJarHead
I have a strange fascination with knots and ropework right up there with rutabagas and searching for the perfect meatball and air guns.
(An odd mix, eh?)
Knots and ropework are skills and knowledge I think every prepper should have. I will be writing about various knots I have used here on the farm in practical uses, and some knots that I feel could be useful. While there are enough knots known to fill more than a few books, I will concentrate on what I think are some of the more useful ones.
In this particular case, let's say you are trying out using a tarp for lightweight camping using 550 cord. This bend/hitch would be used for the corner eyelet of your tarp. Imagine the carabiner is the eyelet.
Technical Information
Note: For instructional purposes and clarity, I did this ropework using a 5mm accessory cord. When I tried 550 cord, the black and OD green cord did not provide enough contrast to effectively render the pictures. The carabiner was not only used for clarity but as an example. The same knot/hitch could be applied in any number of manners.
-The end of the cord/rope that is being worked is called the running end.
-The end of the cord/rope that is not being worked is called the standing end.
-Red arrows/graphics indicate the direction and path under/behind either an object (e.g., carabiner, eyelet, rail, etc.) or cord/rope.
-Yellow arrows/graphics indicate the direction and path over/front either an object (e.g., carabiner, eyelet, rail, etc.) or cord/rope.
-Green arrows/graphics indicate the direction of applied tension of cord/rope.
The Gaff Topsail Halyard Bend/Hitch
Step 1: Bring the cord/rope under the object.

Step 2: Bring the cord/rope around the front and then behind, making one wrap.

Step 3: Bring the cord/rope around for a second wrap and tuck behind the standing end.

Step 4: Bring the running end around the standing end and then through the two wraps.

Step 5: Pull on the running end to secure and complete the bend/hitch.
